Sound design and Foley: phone sound effect  

For this particular project I conducted the Foley before the sound design. This was because parts of the Foley were going to be manipulated in the sound design process. This process took a whole day. I was very limited to the times I could do this as the university facilities because they were fully booked. Therefore I was limited to that one day to complete the Foley for the whole film.  I don’t think this effected the result too much as it was quite a short film, however did prevent me from making any changes to the Foley afterwards. During this process I edited the Foley as I went along. This prevented the situation of needing to re-record bits of Foley later on as I have already edited it and determined if it needed re-recording. There wasn’t a lot of Foley needed as the movement in the film was limited. The main bit of Foley recorded was clothing noises that represented movement in the scene. This helped the scenes come to life and made it seem more ‘real’. I felt that the original sounds from the kitchen scene (where the actor puts the cake in the oven) could have been improved a lot. Therefore I re-record the entire scene including the oven door opening, cake sliding in the oven, door closing, clothing noises etc.

The first thing I did regard sound design, was find a voice for the phone operator. Originally the director want this to be a human voice that was ADR’ed. I thought it was a good idea for an artificial voice to be used. This made the prison operator voice sound much more professional and makes the audio feel it’s more genuine. I did a bit of research around the best voice generator to use. I tested the most recognizable one first, ‘google translate’. But that like many sounded too robotic. I kept searching and found ispeech:

http://www.ispeech.org/text.to.speech?link=http%3A%2F%2Fwww.ispeech.org%2Ftext.to.speech%3Fvoice%3Dukenglishfemale%26action%3Dconvert%26speed%3D0%26text%3D%2520This%2520is%2520a%2520collect%2520call%2520from%2520an%2520inmate%2520at%2520Her%2520Majestys%2520prison%2520Wallington.%2520Please%2520Press%2520five%2520to%2520accept%2520

This was the exact voice I had in my head. It didn’t sound too human and didn’t sound too robotic. It sounded exactly like a phone operator.

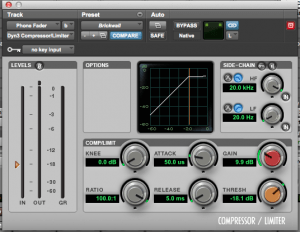
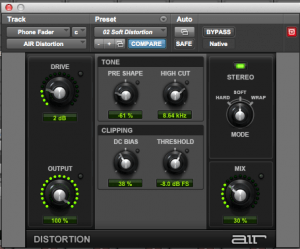
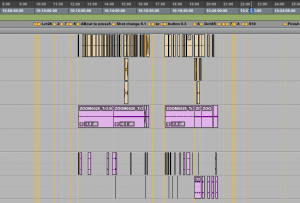
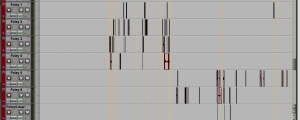
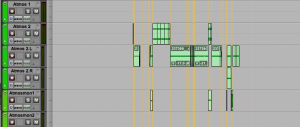
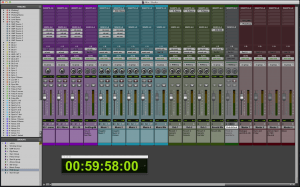
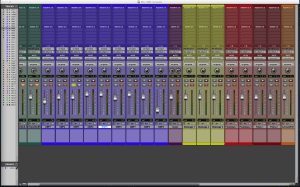
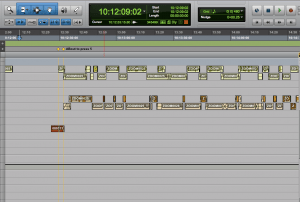
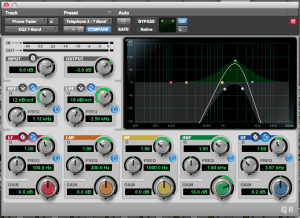
The main part of sound design was making the sound effect of the phone. I created a bus track that would be connected to all sounds that need to sound like they are coming from a phone. I used an EQ plugin to remove the low and high frequencies, as well as boost the mid frequencies. I also used a brick wall compressor and a smidge of distortion. This gives the impression that their voice is coming from the phone. I then used a room tone atmosphere, increased the volume and run that through the same EQ plugin. Other things added included vinyl crackles, door slams etc. found in a sound FX library to give the audience more of an impression that the sound is coming from a prison. I then run all of this through several plugins, EQ, reverb and distortion that made the sound more convincing.


Screen Shot 2016-05-06 at 16.15.38 Screen Shot 2016-05-06 at 16.15.58 Screen Shot 2016-05-06 at 16.16.05 Screen Shot 2016-05-06 at 16.16.46 Screen Shot 2016-05-06 at 16.17.14 Screen Shot 2016-05-06 at 16.17.23

Process: All Ribbons End: Draft screening and ADR recording

After the dialogue edit I organized a draft screening with the film group. This had many advantages, it meant I could hear the project in another set of speakers and get personal feedback from the director and group. After screening the film, the group were impressed with what I did in a short space of time. There were a few things that were mentioned including levels of Foley, and sound design for the phone call. However I had told them prior to the meeting that this was a very rough draft and far from finished.

After this we recorded some ADR for the bingo scene in the film. The editor (Jordan) volunteered to be the voice. Because I didn’t have access to any of the university facilities as they were fully booked I set up a ‘make shift’ portable studio. This involved using the ‘Zoom H4’ as an audio interface that worked through Pro Tools. I used a cheap Dynamic vocal microphone as this would reproduce a similar sound to what an actual bingo caller would use. Once this was recorded, I processed it straight away to see if the director was happy with the sound of it. I added artificial reverb, panned it a bit to the left and boosted some of the low-mid frequencies to give it a more boomy room sound effect. This worked really well and the group seemed very impressed with the speed and quality of the result.

Dialogue editing and iZotope RX

Related to LO2

This post will look into the research and process of dialogue editing for ‘All Ribbons End’. This was the first stage for audio post production on this particular film. This process not only ‘cleaned up’ the location audio and made it audible clear and better quality; it meant by the end of this process it would then determine on how much of everything else I would need to do. It would determine any Foley I needed to do, atmospheres I have to create, and any ADR that was needed. However ADR was not possible due to time restrictions and actors availability therefore I had to make sure that the dialogue was as best as it could be.

For my research on dialogue editing I used a book by John Purcell: Dialogue editing for motion pictures-A guide to the invisible art.

This was a very useful text, as it explained the role, how to get started, how to fix certain problems etc. I also used this text in the first semester. It proves to be a good book for problem solving issues with dialogue editing and is clear, easy and very useful guide.

“A dialogue editor is responsible for every sound that was recorded during the shot. She takes the more or less finished film from the picture editor, makes sense of the edited sounds, organizes them, finds out what works and what doesn’t. The dialogue editor wades through the outages to find better articulations quieter passages, sexier breaths, and less vulgar lip smacks…Dialogue editors work to remove the filming from the film. Dolly squeaks, camera noise, crew rustling, and light buzzes must go; otherwise, the magic of the movies is comprised.” (Purcell, 2007, 1)

So, just what is the dialogue editor’s part in this process:

To organize and manage the material.

To smooth the transitions between shots so conversations appear to be happening in the same place at the same time

To fix articulation problems, overlaps and language issues.

To address unwanted, unseemly actor noises.

To pay attention to changes and adds that will enhance the story or motivate characters’ actions.

To remove unwanted external noises

To replace sections of dialogue corrupt by distortion, wind, clothing rustle, boom handling and the like.

To determine what can be saved through the editing

Before i started this process i wanted to make sure I was prepared. Therefore read some of the chapters in Purcell’s book and used them as a reference when having any issues with the dialogue editing. The chapters that were particularly useful included:

Getting started on dialogue editing

This chapter was extremely useful in outline the necessary preparation before going ahead and diving into the dialogue editing. It suggests the best ways in which to set up, syncing an OMF file, using a template session etc. For this process I used my own template that I created previously. In the previous project I created a Pro Tools Session Template with reference to the Template given to us by Grant Bridgman in a previous lecture. However after assessing some of the issues with the template I used, I amended it further. Below are the two old templates in question. The left is the Grant Bridgman one and the right is my old template. My new template took my old template and modified features that made it more similar to Grants one. The first thing I did was add working tracks and Junk tracks. This meant I could work and edit on select bits of audio. once it has been edited I placed it in the dialogue tracks. therefore I knew it was complete and I wouldn’t try and edit and or delete things that didn’t need to be. the Junk were used instead of deleting files. This proved useful as sometimes I wanted to access clips that I previously deleted. This was much easier to access through the junk tracks than having to reimport an OMF session.

Screen-Shot-2015-12-03-at-12.19.57-2 Screen-Shot-2015-12-03-at-12.52.00-3


Now the actual editing

This chapter gives an outline of the dialogue editing process. It talks about checking boarding the audio files on tracks, organizing scenes into shots, splitting by sound edits, not picture edits. Finding room tone, making edits etc.

Here is an example of my dialogue edit early on in the process.

Screen Shot 2016-05-06 at 14.44.17


Damage repair


This Chapter was especially useful as reference tool for when i needed to overcome an issue with the edit. It starts by talking about the common issues that dialogue editors have and how to repair the issues. It talks about using room tone, and how to use it to repair audio in regards to sounds being there that shouldn’t, and finding literate takes. In which i did for a few occasions where the dialogue was bad quality in the original recording. Finding other takes was really easy as one of the charters were never in shot. Therefore the voice coming from the phone call could be fixed easier than the actor on screen.

IZotope’s RX plugin was very useful during this whole process. This is a very powerful tool that did many things that helped improve the quality of audio during the dialogue editing process. The videos below really helped me in understanding how to use this software and how powerful it can be.

This video gave me an amazing incite to RX. Before I accessed this video I was simply playing around with the tools (not really knowing what I was doing. I also never touched the spectrograph editor. I was quite intimated by how complicated it looked. I basically guessed how it worked and didn’t know how to get a result out of it.  However this video simplified it a lot, and it was amazing how easy it was to use. the caption for the video was: “Learn how to deal with gaps and dropouts, wind noise processing techniques, tips for visual editing in the Spectrogram, help with removing unwanted sounds, and a deep dive into the De-noise, EQ, and Ambience Match tools.” this is exactly what I learnt from it, and it considerably helped aid the quality of the final audio I delivered to the client.

As well as this Video, I used used izotope’s ‘RX cook book’. This is a free access site that lets you look for a specific problem and the solution to the problem, as well as tutorials on how to use the software.

https://rxcookbook.izotope.com/?_ga=1.56952042.1544855555.1462544177

The main tools I used was the ambience match, Dialogue noise reduction and the ‘connect’ feature that allows you to edit the spectrograph outside of Pro Tools.

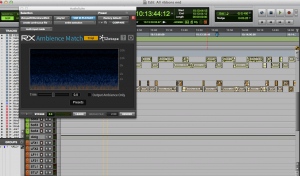
One of the issues I had with the last project is that i couldn’t find enough ‘silence’ to fill certain gaps. This very effected the overall quality of the audio. The ambience match tools was an amazing feature i used very frequently in this project. Any time where I needed ‘silence’ I didn’t need to go through lots of takes to find a similar ambient sound. It also meant the audio could be a lot more consistent, and I could record bits of Foley that wouldn’t sound out of place.

Screen Shot 2016-05-06 at 14.45.32

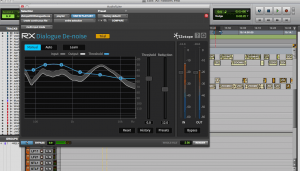
Another issue I had in the last project was background noise. The Dialogue DE-noise was a very easy to use and power tool that helped get rid of the background noise. This was quite essential in a film that has big gaps of silence in. The background noise can be very distracting for the listener. After experimenting however, I found that if this tool is overused, it can degrade the quality of the audio. When the noise is reduced too much it sounds a bit like a ‘phasey gate’ and is very distracting. There was a few occasions were I had un-do the processing as it sounded worse than before it went through the de-noiser.

Screen Shot 2016-05-06 at 14.45.57

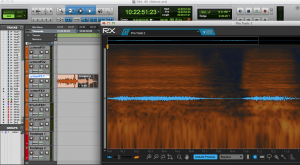
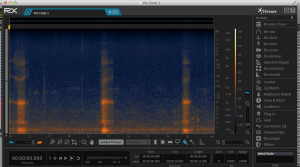
The main RX module with the spectrograph was an amazing feature when it came to wanting to pick a part certain parts of the audio. You can turn down certain frequencies as well as ‘rub out’ other specific frequencies. this function was most useful when trying to get rid out certain sounds such as knocks, boom bumps, clicks etc.

Screen Shot 2016-04-26 at 20.19.27Screen Shot 2016-05-06 at 14.48.08


All Ribbons End Location sound

Location Sound recording.

The challenges and issues we had on the location sound of Petal Child really helped, as what i learn on that could be used to improve on the shoot of All Ribbons end. Firstly, I was a lot more prepared, and the recent practice from the previous shoot meant i was more confident at doing it. I rebooked into some research, specifically from Ric Viers and Lecture slides from Grant Bridgman to refresh my knowledge.

Ric Viers wrote in his book ‘The Sound effects bible’ Ten commandments a sound recordist should follow for a professional recording. The commandments are as followed:

“Thou Shalt Have a Pre-Roll and Post-Roll of Two Seconds on Each Recording.

Thou Shalt Record More Than You Need.

Thou Shalt Slate Every Take with as Much Information as Possible.

Thou Shalt Check Thy Levels Often.

Thou Shalt Listen to Thy Work by Always Wearing Headphones.

Thou Shalt Eliminate All Background Noise.

Thou Shalt Not Interrupt a Take.

Thou Shalt Point the Microphone at the Sound.

Thou Shalt Check Thy Equipment Before Going Into the Field.

Thou Shalt Remember the Copyright Laws to Keep Them Unbroken”

Last year we had a number of guest lectures from Grant Bridgeman, an industry expert with regard to sound for visual, and specialising in location sound recording. Therefore it seems a good idea to refer back to the lecture he gave last year.

Grant started by explain the definition of location sound: “The art of capturing sound on location (generally dialogue) without compromising the image.” (Bridgeman, 2014)

Grant then explains the importance of concentrating more on recording the dialogue than everything else. This is mainly because any other sounds made, can be recreated. However the actors voices can’t, (unless they use ADR, which isn’t time or cost efficient) therefore it is important to get clean quality dialogue.

He then explained the importance of the location you are recording in. His slide asked the questions:

• Is it quiet ?

• Is it controllable ?

– Why is this a problem ? – Editing

• Planes, Trains & Automobiles

• Reverberation

– Why is this a problem ?

• Wind Noise – can be prevented

Grant then went into the features/details/things to think about with regards to some of the equipment.

“Equipment 1 – Shotgun

• Shot gun (or short gun) Mic and Boom

Pole

– Sounds Open (Natural)

– Very sensitive

– Directional – (on axis)

– Wind Protection

– Phantom Power (+48V)

– Handling Noise

Equipment 2 – Personal Mic

• Personal Mic’s. (Tie Clip / Lavaliere / Wire)

– Sounds “closer” (too close?)

– Wires can be restrictive to movement

– In View / Hidden ?

– Clothes Rustle / Movement Noise

– (Radio mic’s too)

– More prone to wind noise…

Equipment 3 – Recorder

• Sound to Camera or Separate Recorder

• To make the best of having two microphones record

them to two channels.

• Allows comparison

• Stops a single problem ruining both audio tracks.

• Place the personal mic at the sternum

• Keep the boom mic pointing at the dialogue

• (aim the mic ‘at the chin’ of the person speaking)

• Don’t play back both mic’s at the same time!

• Phasing – Picture editors often don’t know this. ”

After considering these points, i decided to use a boom microphone and personal microphones. The boom mic is effective if the actors are moving around a lot, as personal mics will pick up clothes noise. However in big wide shots, it difficult to get a boom close to the mouth of the actors.

Grant also talks about sound levels. Sound levels are really important because if levels are too quite, there will be alot of background noise, however if it is too quite, it will be prone to distortion.

Grant also mentioned a technique of using a boom microphone pointed away from the actors, and a personal mic blended together, so that the sound of the radio mic doesn’t sound like its so close, however this could not be implemented due to being a one man recording team.

The equipment I used included:

Zoom H6 recorder

Zoom H4 recorder

Sennheiser MKH416 Rifle Mic and boom pole

Rode NTG-2 boom mic and Mic stand

Radio microphones

The zoom H6 recorder was the main recorder used in the location sound recording process. Ideally I would have used the Sound devices 633 mixer/recorder (industry standard for location recording) however availability of equipment was very limited. The issues with the H6 recorder is the manoeuvrability when using multiple inputs and being the boom op at the same time; and the headphone amplifier on the device (which made it extremely difficult to monitor the sound. However these issues were overcome by. The manoeuvrability problem was overcome by creating a ‘makeshift’ recorder bag, much like the sound devices 633 would have come in. This mean I could monitor, record and boom more efficiently. The headphone amp issue was over come by referencing in different headphones, constantly check levels and checking sound files on a computer after each shoot. The zoom H4 recorder (stereo microphone) was used to capturer a stereo ambience of the bingo hall.

Radio clip microphones where used throughout the whole shoot to capture quality dialogue. They were also used as ‘backup’ room microphones in shots that had no dialouge. The Sennheiser rifle microphone was used as the main source of capturing dialouge, breaths and movement noises.

One challenge was recording the phone call live during the shooting. This was the preferred method of recording the phone call from the director to capture the best/more natural performance. (ADR can sometimes sound unnatural and lack performance.) Originally the plan was to record both the actor and actress in the same room and record the dialogue of the actress by using a radio clip mic. However this would then cause problems later in the dialouge edit. Therefore the actress was recorded in a separate room. I set up a boom mic on a microphone stand and placed a radio clip mic on the subject. We then made a real live phone call for the takes so the subjects could hear each others performances. An extra pair of headphones was given to the director so he could all hear both subject’s performances. This was very effective in isolated the different dialouge tracks.

Originally I was recruiting help with the location sound recording. This would have meant extra effort could have been put in when booming and checking levels/monitoring (especially as the headphone amps weren’t very good.) However it was unfortunate that the person i had to help me pulled out due to other commitments. Overall it was a fairly easy shoot with little issues.

References

Ament, Vanessa Theme. The Foley Grail. Amsterdam: Focal Press/Elsevier, 2009. Print.

Chion, Michel, Claudia Gorbman, and Walter Murch. Audio-Vision. New York: Columbia University Press, 1994. Print.

Cook, Frank D. Pro Tools 101. Boston, MA: Course Technology, 2011. Print.

Lyver, Des. Basics Of Video Sound. Oxford [England]: Focal Press, 1999. Print.

Purcell, John. Dialogue Editing For Motion Pictures. Amsterdam: Focal Press, 2007. Print.

Viers, Ric. The Sound Effects Bible. Studio City, CA: Michael Wiese Productions, 2008. Print.

Weis, Elisabeth, and John Belton. Film Sound. New York: Columbia University Press, 1985. Print.
Location Visit

Yesterday I visited some of the locations i will be shooting at for the next film i’m working on, ‘when the ribbon ends’. The reason behind this visit was to research the ‘sound’ of the environment i will be working at. This will prepare me for issues i may have regards to the sound of the environment.

The first location was a hexagonal hall. The first impressions was the loud radiator sound and reverberation of the room. Due to the reverberation i will need to use close mics (radio mics) on my subjects, as well as get in as close as possible with the boom microphone. On a lot of my shoots i have used hidden microphones, however due to the sound and openness of the room this will not be possible. The second issue was the radiator. This makes a loud buzzing sound and CANT BE TURNED OFF. This could potentially cause an issue, however it is a constant buzz and doesn’t make a lot of varied sounds. Therefore its likely that post production will get rid of this sound, or be masked by the background sound. (this scene is a bingo scene so we can have lots of people talking in the background). The crew are however, filming away from the radiator so hopefully the sound won’t leak that much.

The second location was a small bed and breakfast. My first impressions were great, the house was hidden away from the roads and i didn’t hear a plane go by. The kitchen in which they were filming in was silent, until the fridge started buzzing. Therefore we will need to make sure that gets switched off during recording. The second issue was that there was a boiler in one of the bedrooms that makes a bit of noise. However we will not be filming in that room and when the door is shut the sound is killed.

The third location is outside the Holiday Inn on the Brayford. This is a very busy environment with lots of people, near a main road and with train crossing alarms near by. However there is next to no dialogue in the scene, therefore wont be an issue as the soundtrack can be completely rebuilt in necessary.